

I have taken my Sears/Kenmore/Frigidaire/Electrolux front load dryer apart a few times to fix it and thought that since so many people enjoyed my post on fixing my Keurig coffee maker (about 33000 page views so far), I would do the same with this project.
Like my B60 Keurig coffee maker, I have a love-hate relationship with this dryer… okay, lately it is more hate, but whatever. This model, 970-C87192-10 has a specific flaw that I have found annoying in the extreme, but from what I can tell in a few web searches, this may be a common problem and so is the fix. In this model, there is a small space at the bottom of the drum where it meets the door and often, zippers, buttons and clasps will slip in there and wedge between the door and the drum, eventually twisting off completely and usually this results in destroyed clothing. R.I.P. favourite Disney hoodie 😦
The following describes the process of replacing the drum guide and felt seal in this particular dryer model, but other front load dryers share a similar problem. Over time, the plastic drum guide and the felt it rides on both wear, which makes the gap larger and more susceptible to this problem, so even once this is fixed, it should probably be replaced every couple of years as preventative maintenance.
 Dryer Model: 970-C87192-10
Tools Needed:
#2 Robertson or #3 Phillips Screwdriver (they both fit these combo-screws)
Thin blade (#2) standard screwdriver
Vacuum
 This should take about an hour, but take your time because the inside edges of the metal are SHARP and I manage to cut myself every time I open this thing up. Every… single… time.
 Next, remove the screws of the lower panel and the panel should basically just drop off. Try to do that gently. There are two more screws under that panel that hold on the door panel assembly so remove those as well.
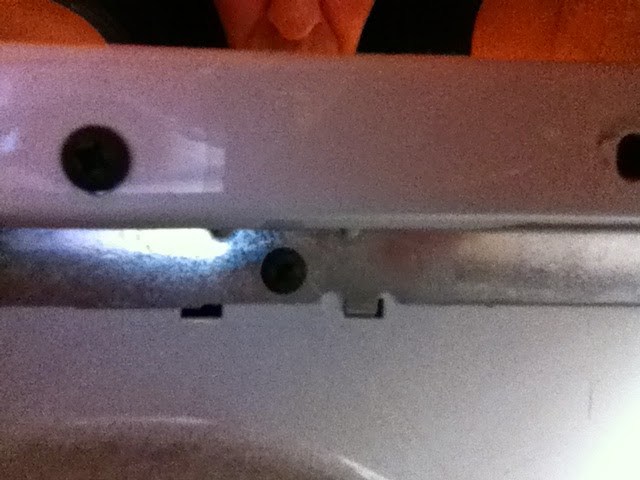

 Gently lift up and pull the door panel away from the main body and set it on the floor. That will reveal the open dryer, drum and motor as well as a whole bunch of lint because this dryer is really horrible at containing the lint in the exhaust path. Vacuum out the whole body and the inside of the door. This is important for fire hazard reasons anyway, but you will also want to have a nice clean area to work with for the next part of this adventure.
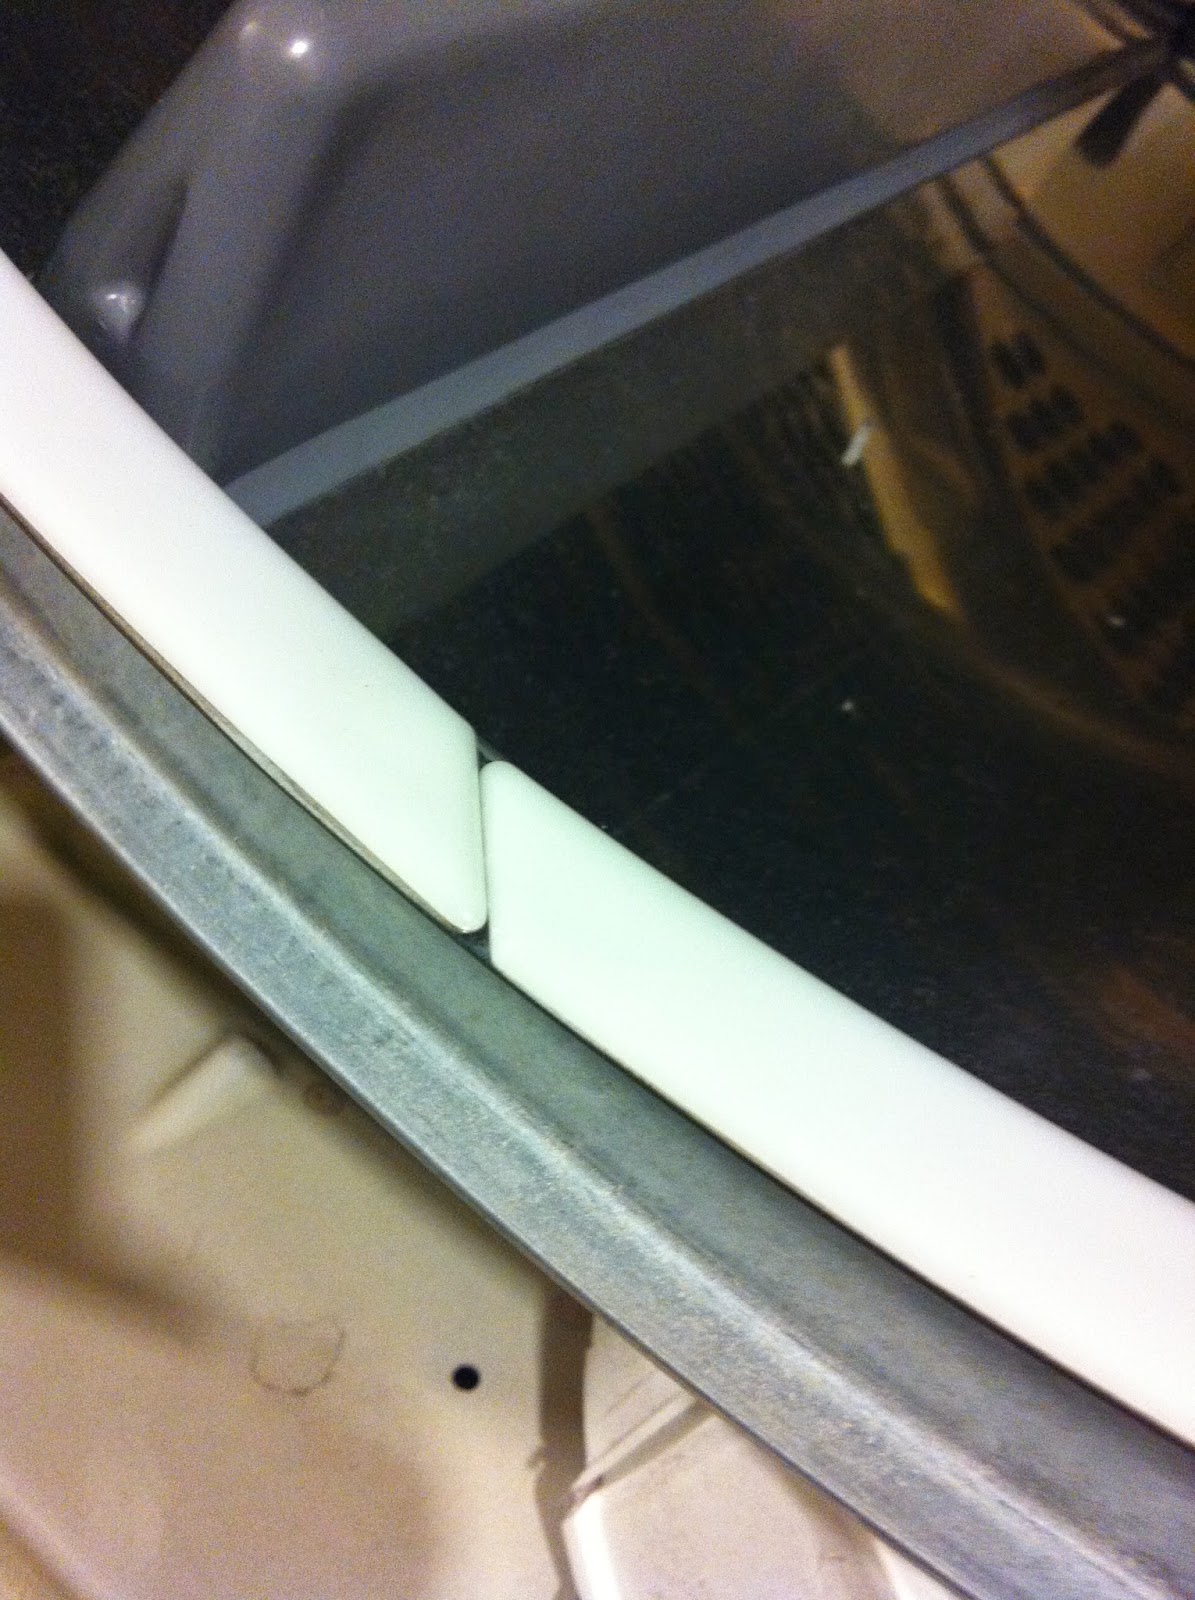 Inside the rim of the dryer drum, you will see a plastic white strip that is probably in really rough shape.
Mine was in pieces with holes and fractures everywhere as well as having a deep wear band in the center – the primary cause of ruined clothes in my life. This can be removed and discarded. Replace that with the two “drum glides” using one of the double-hole sets (see picture). Press these in until they click.
 On the door, you will see the felt seal is in two parts – don’t mix these up. Remove the top section and clean the area of any debris. Apply a film of the high temperature glue to the replacement top felt piece and wait one minute (60 seconds) for the glue to become tacky, then apply and press it into the same location as the original. Repeat that process for the lower seal and wait at least 5 minutes before attempting to reassemble.
I sincerely thank you for your post. I've had to have service come in twice for this very problem, thankfully under warranty. But now my dryer is at it again. This is the exact fix the serviceman did. The tectorial is great, not to mention the detailed parts list that I will need. 2 thumbs up to you.Thanks, Debbie
LikeLike
Awesome, this post saved me a ton of cash. Although the parts are now much more expensive, repairing it myself was gratifying and still a lot cheaper than hiring someone. Thanks again!
LikeLike
Thanks for posting this how-to article. Used it and saved a lot of cash on repairman. There's something about learning how to do a fix and then executing that leaves me feeling accomplished.
LikeLike